Set up your space
Set up the workspace your team and agents will work from: business identity, customer model, data region and sending domain. This guide covers manual setup through Workspace, Brand and Contacts, plus what to review when starting from your website. Domain verification remains a separate step before sending.
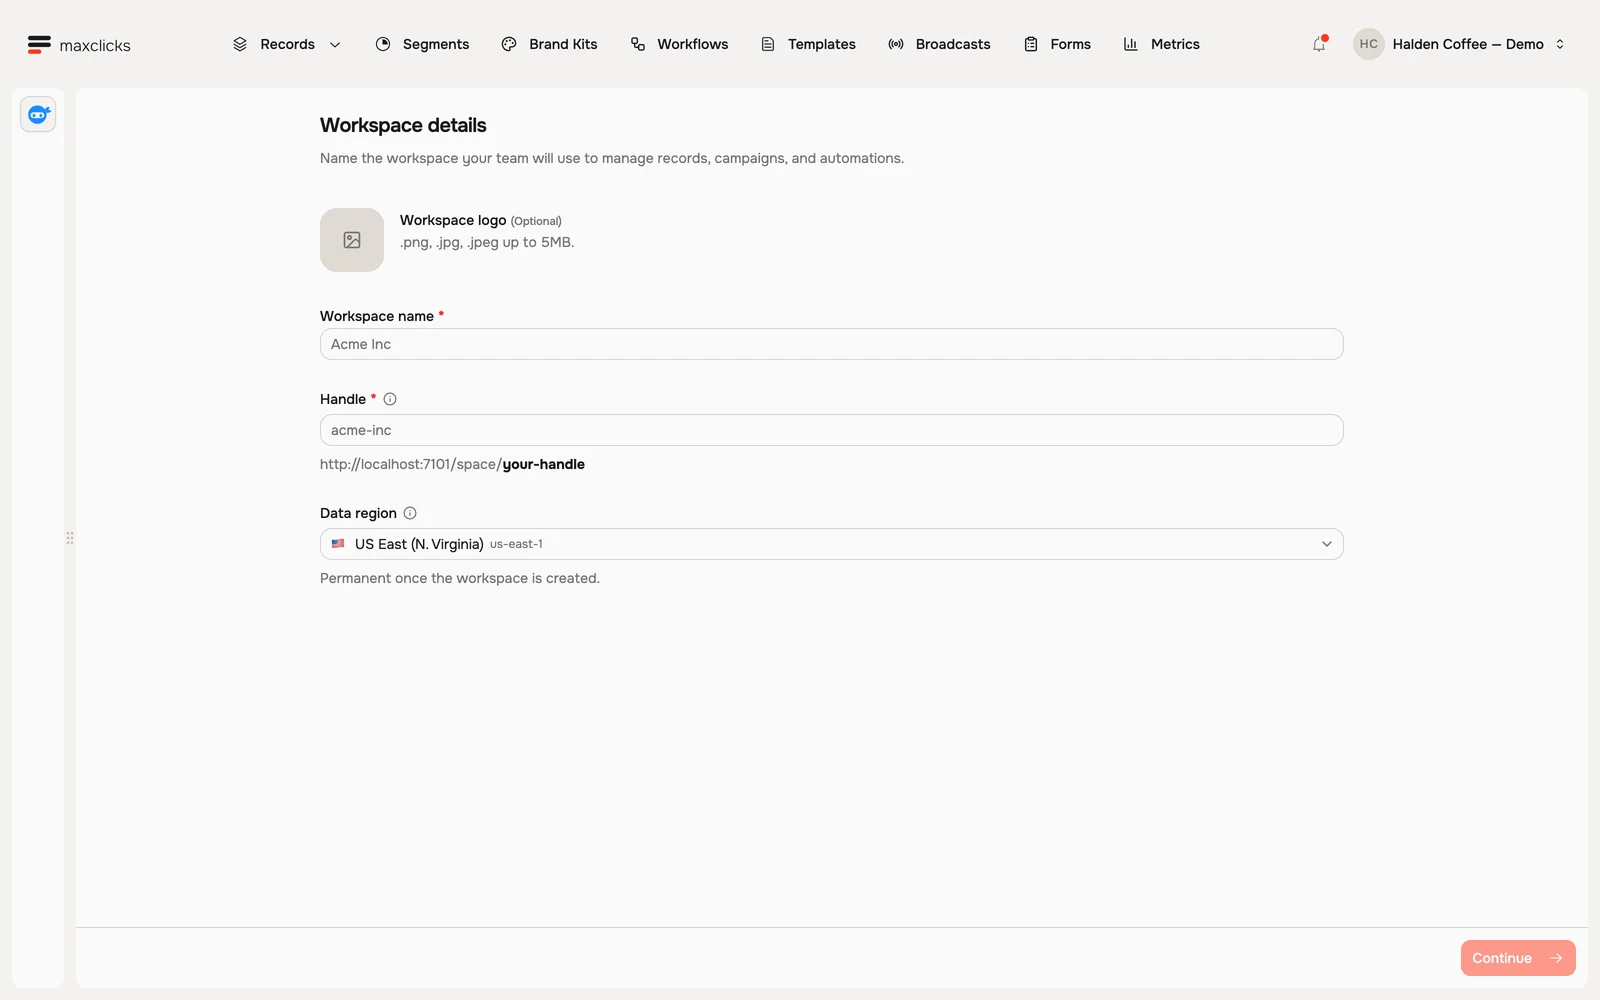
Choose how to start
Manual setup lets you enter the business details yourself. The website-assisted path has eight stages: Website, Workspace, Brand, Contacts, Voice, Content, Assets and Design. maxinja extracts a starting point from the website, then you review the proposed fields and materials before creating the workspace.
Check the real business name and address, sender domain, customer type, voice rules, footer links, selected assets, colors and typography. Extracted content is a draft of your brand context, not confirmation that every fact or image is suitable for email. The three manual stages below establish the same core workspace and customer model.
Step 1: Workspace
You become the first admin of the space you create, which is the role that invites teammates.
Give your workspace a name
Type the name your team will recognize, usually your company name. maxclicks turns it into a handle, the short web address for your workspace, and you can edit it. The handle has to be unique across maxclicks, so a short version of your company name works best.
Pick your data region
Choose Data region from the regions offered for the workspace. Check the required region with your team before creating it; the selection configures the workspace's regional resources.
This one is permanent. There is no way to move a workspace to another region after it is created.
Add a workspace logo (optional)
Upload a logo or image to make the space recognizable in the workspace switcher. You can change this any time in settings.
Step 2: Brand
These details say who your emails come from: your brand name, your logo, the domain you send from, and the postal address that has to appear in your footer.
Enter your brand name and website
Fill in your brand name, the business identity your content uses, and your website. You can also upload a brand logo, which appears at the top of the emails you send, a square brand icon, and a short summary of what you sell and who you sell it to, which maxinja reads when it writes in your voice.
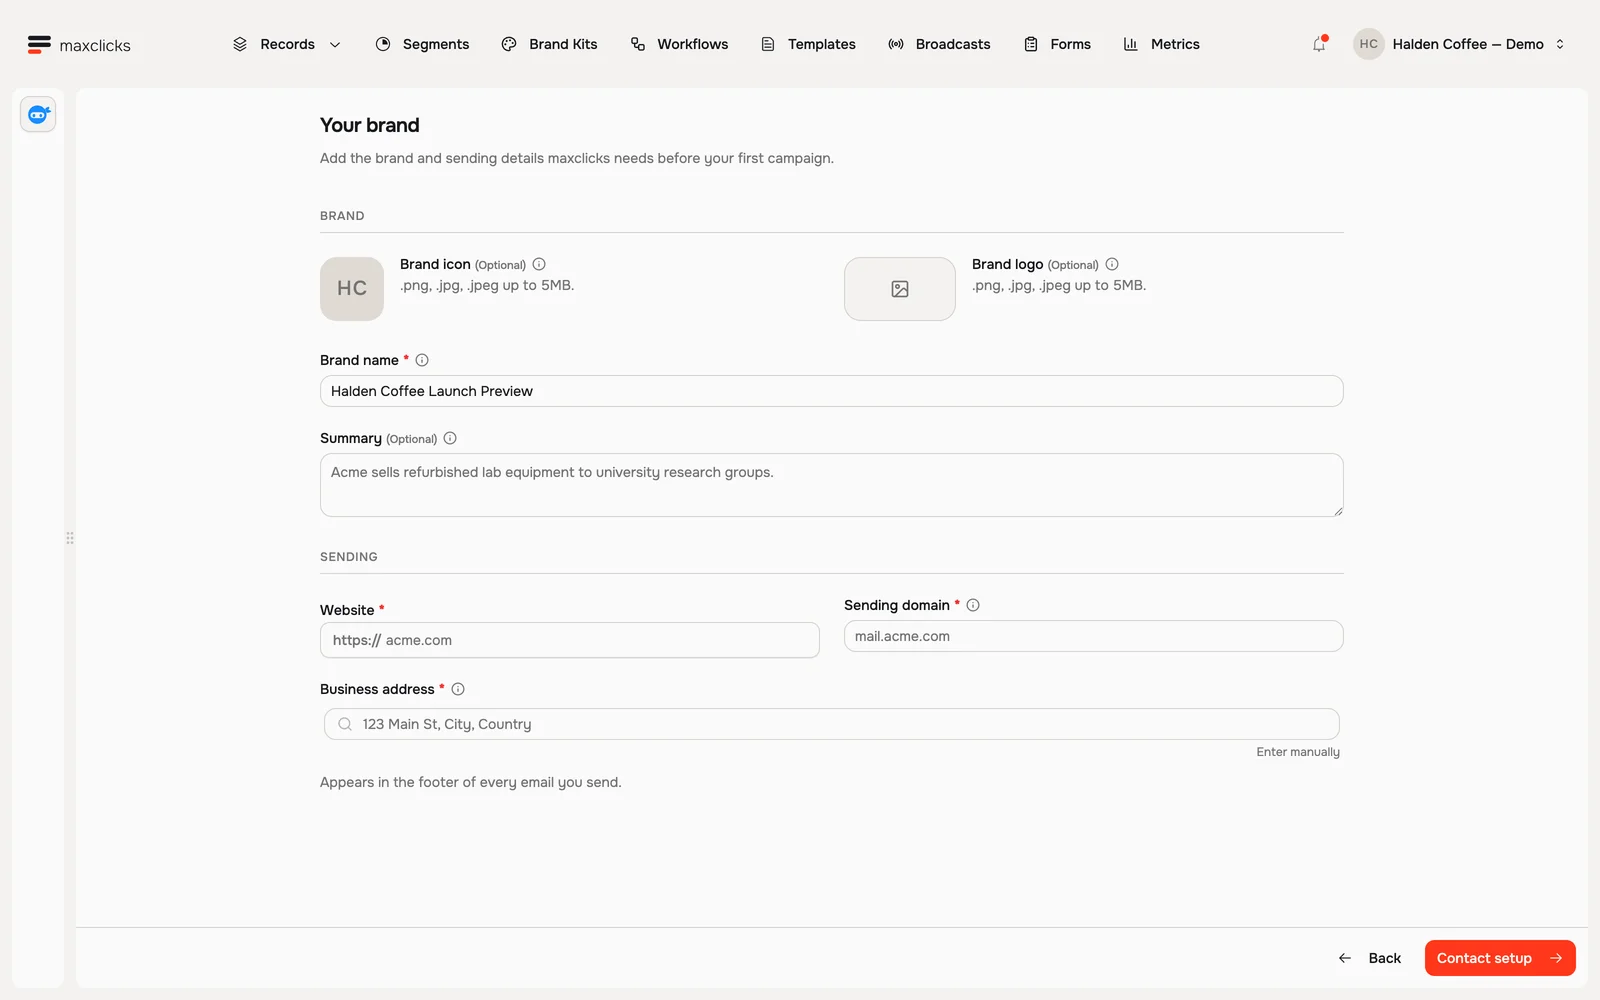
Demo setup · Brand and sending fields before submission. Walkthrough steps
Enter a fictional workspace name and continue to the brand step. Inspect brand identity, website, sending domain and business-address controls. Other visible examples are placeholders; no new workspace or external sending resource is created.
Choose your sending domain
Sending domain is where your emails go out from, such as mail.acme.com. maxclicks suggests a
mail.subdomain of your website, which gives marketing email a distinct sending identity. A subdomain does not guarantee reputation isolation; see subdomain guidance. Naming it here does not verify it: you add the DNS records after setup, in the section below.Add your business address
Use a real business postal address for the email footer, where your business can receive mail. The country you enter also sets the currency your workspace is billed in.
Colors, fonts, assets, and social links live in a brand kit, which you create separately under Brand Kits. A new kit starts from a default color palette and style pack you can adjust. See Set up your brand.
Step 3: Contacts
The last step creates the first contact type in your space: the kind of person you email, named in the singular and the plural.
Start from a preset or name your own
Pick one of the presets (Customers, Leads, Subscribers, Students, Members, Donors, Clients), or type your own Contact name, which maxclicks pluralizes and turns into a slug. The name shows up throughout the app, in records, imports, segments, and broadcasts.
Create the space
Submit, and maxclicks builds the workspace, the brand and the contact type together. You land in the app with an empty contact list.
You can add more contact types later under Settings, then Schemas. See Understand your data.
Connect a sending domain
Now you prove you own the domain you picked, by adding a few records at your DNS provider. Those records sign your mail, so inbox providers can check it really came from you.
Do this before anything else you plan to send. Campaign, template, workflow and editor test emails require your verified sender domain. Form double-opt-in confirmation uses its own platform address; it does not unlock ordinary sending. On the Free plan, first domain verification grants the one-time credit gift. Eligible new spaces can receive funded maxinja setup assistance before that point; ordinary AI previews and other generation still need available workspace credits.
Open your domain
Setup already asked which domain you send from, so it is waiting for you. Open Settings, go to Domains, and select it. maxclicks shows you a short list of DNS records to add. To send from a different domain instead, use Add domain here.
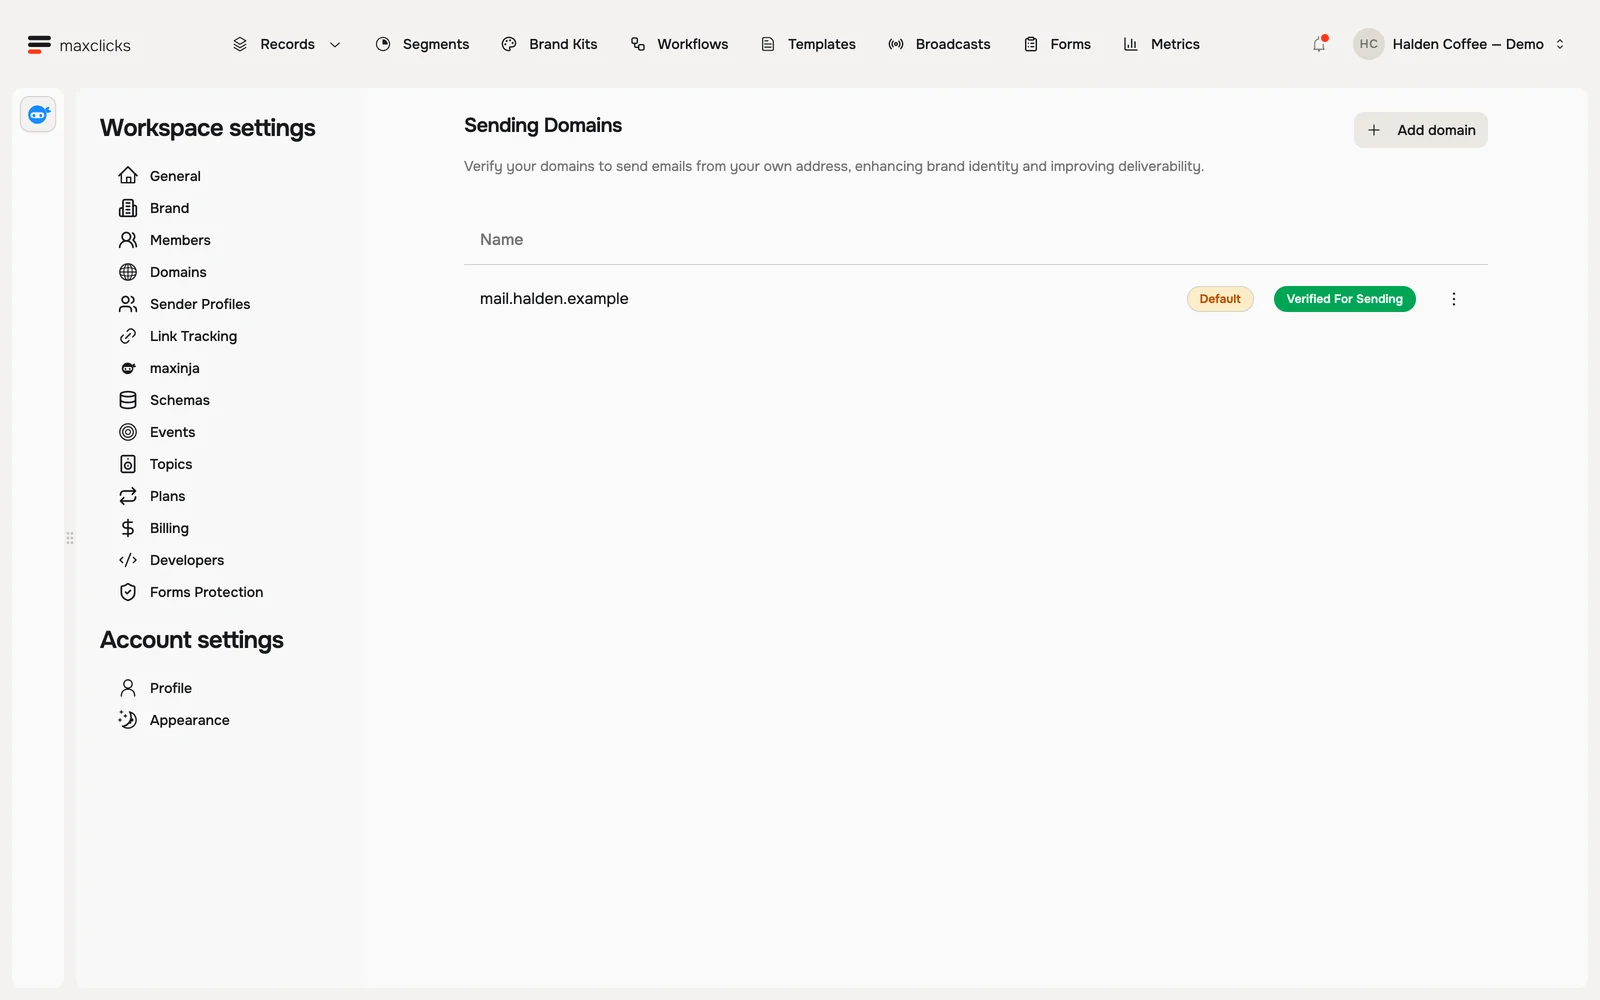
Halden demo · Local sending-domain configuration. The example domain’s status is seeded for the demo; external DNS verification is not demonstrated. Add the records at your domain provider
Sign in wherever you manage your domain (GoDaddy, Namecheap, or Cloudflare, for example) and paste in the records maxclicks gave you. It is a copy and paste job, no coding. Ask whoever looks after your website if you are unsure.
Start verification and wait
Come back to maxclicks and click Start verification check. Follow the individual record statuses and the overall Verified For Sending state. A value saved in your DNS dashboard can take time to become visible to the verification process.
Your DNS provider and cached DNS responses can add a delay. Full detail on the records and the status table is in Connect your domain.
You are ready to send
Your first domain automatically becomes your space default, so new emails use it without any extra step. Once it shows as verified, it is ready to send from.
You only need one verified domain to start. If you ever remove the records at your provider, maxclicks notices and marks the domain unverified again.
Related
Next, take a tour of your space, or jump straight to adding your contacts.